
While most businesses should have systems in place for customer support, they should also expect to receive support claims through any lines of communication they may have open.
These days, customers expect a business to have an online presence that is nimble, responsive, and extensive, so SAP has anticipated this need for companies and allows you to incorporate your social media accounts into its Cloud for Customer Service.
Studies have shown that 54% of customers are using social media (instead of traditional channels) to get support. Hence, you should make sure your customer support software allows you to manage your social media accounts (like SAP does).
Overview
The SAP Cloud for Customer interface is made up of multiple tabs, including ones for customers, people, activities, products, customer service, and analysis. If you are an administrator, you can give your support agents access to whichever tabs you choose. Your support agents will most likely be working within the Customer Service tab of this software.
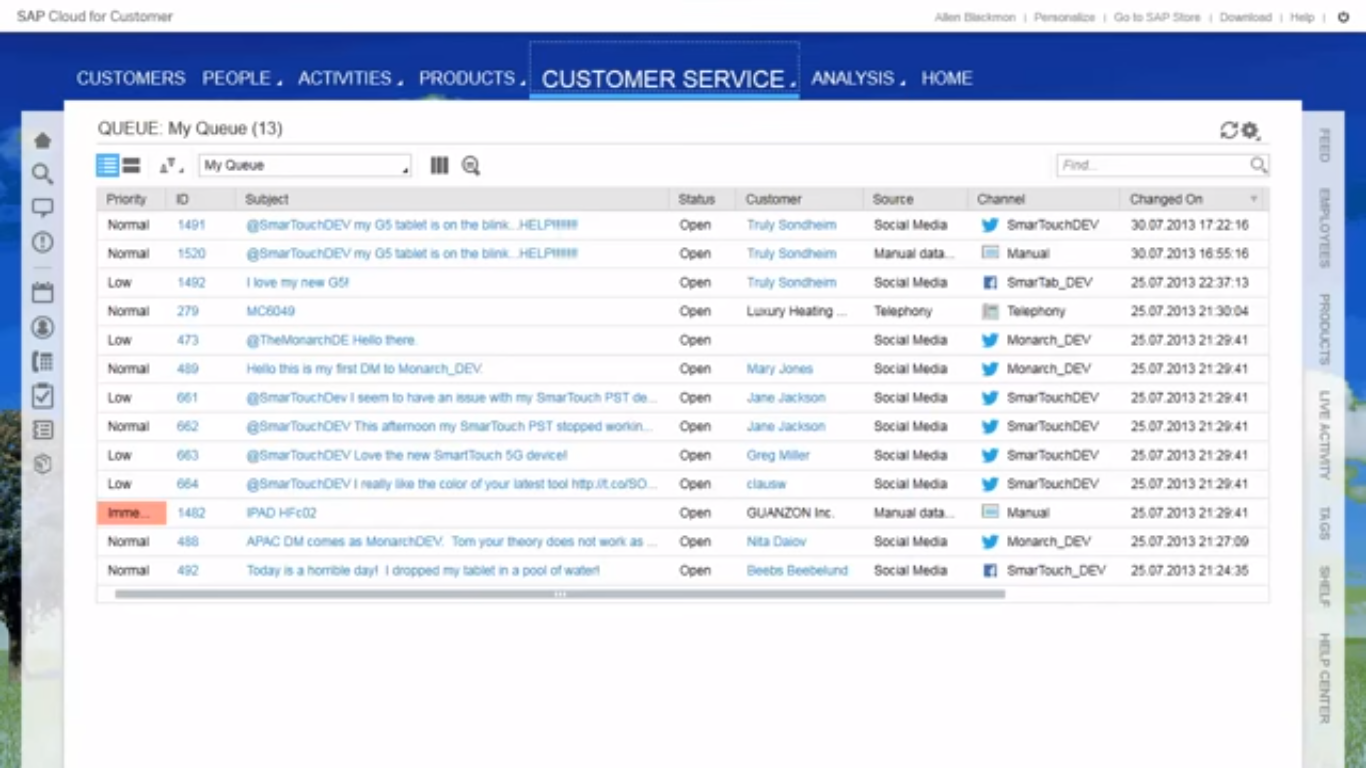
Within the Customer, the Service tab is a queue of pending customer service tickets. As an administrator, you can link your social media accounts so that the queue picks up on any possible tickets that come from social media interactions with your business’s various channels. This list of tickets can be sorted by priority, the ticket ID number, the status, the customer name, and more. In addition, the list can be filtered to narrow.
Viewing Tickets from Social Media Sources
To view all the tickets that originate from your company’s social media channels, first, click the Show Filter box near the top of the window.
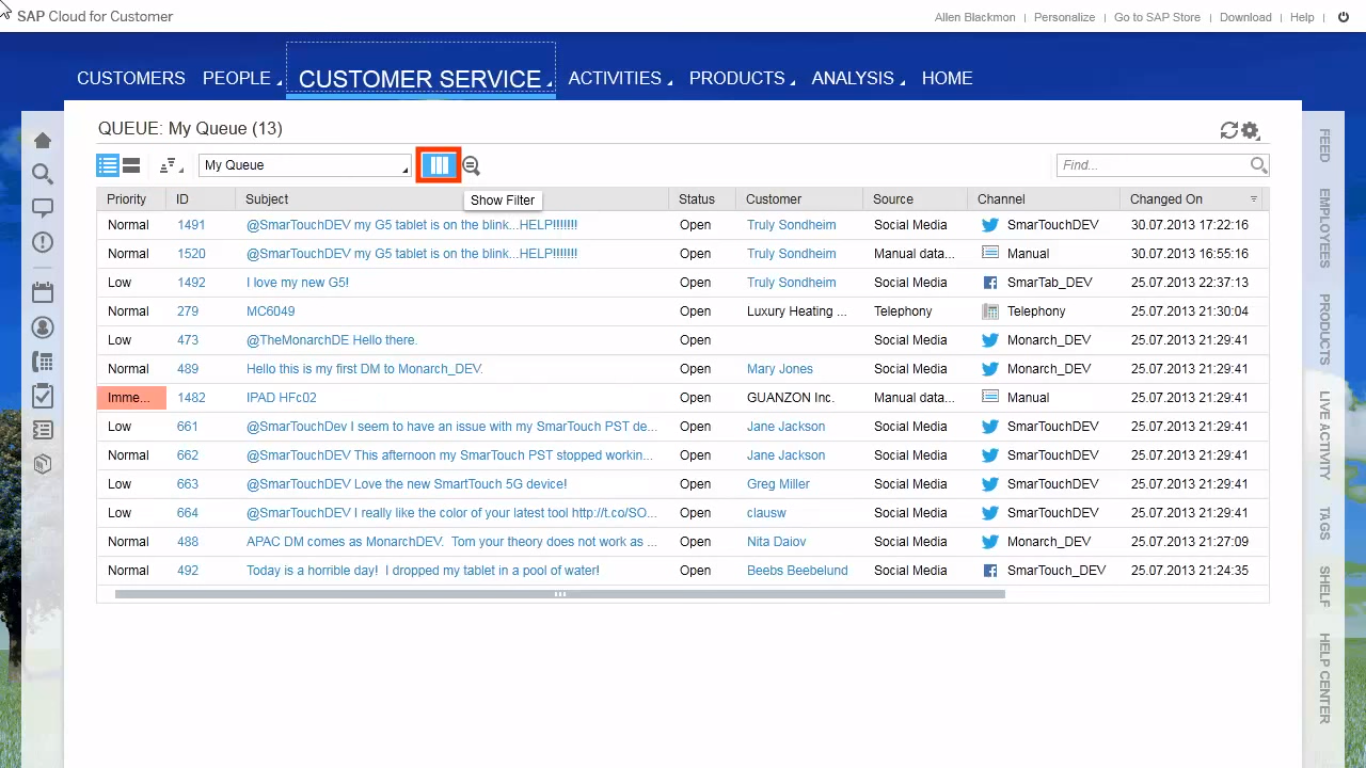
Now, under the Status menu, click Open, and under the Source menu, click Social Media. The list of open tickets originating from a social media channel will be displayed below.
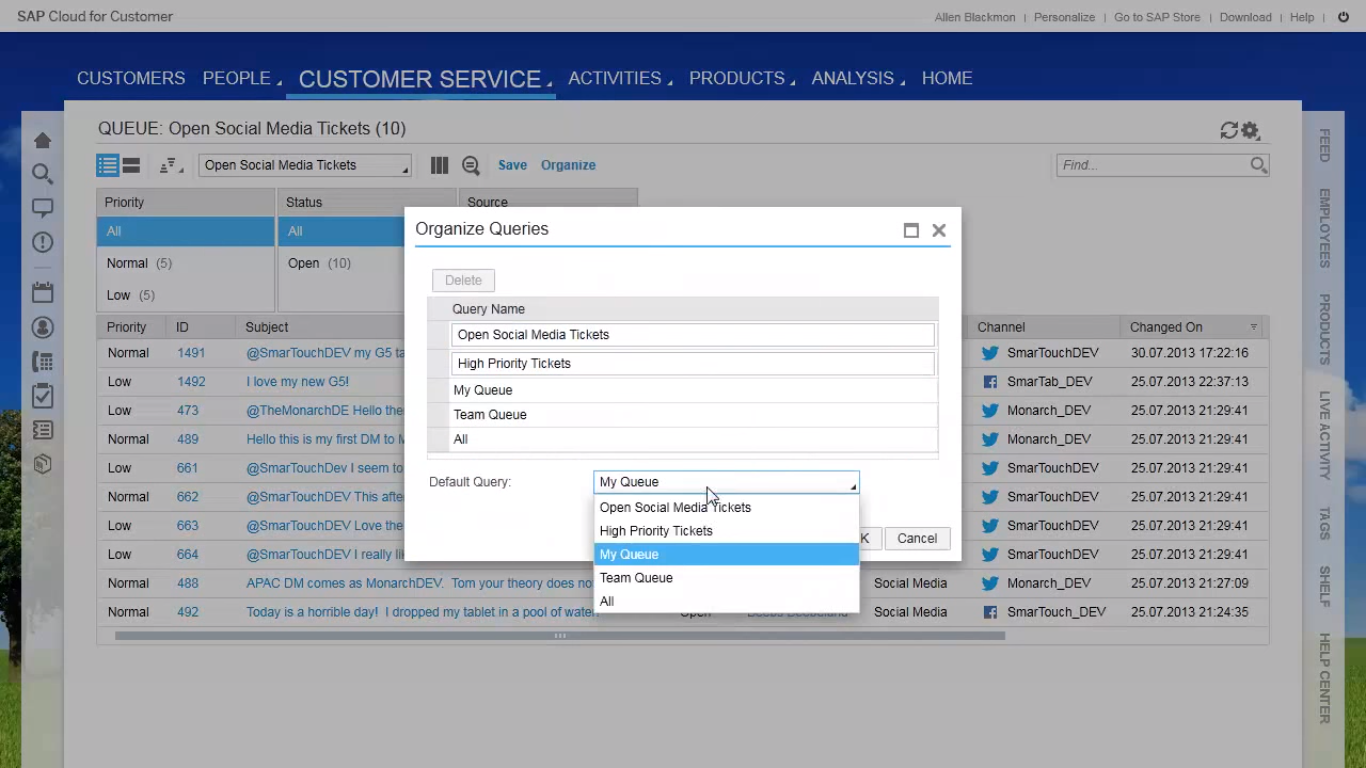
To save this filter, click Save, give the filter a name, such as “Open Social Media Tickets,” and click OK. This filter will now be able to be accessed again via the dropdown menu. To set this filter as the queue’s default view, select Organize and choose your filter from the Default Query dropdown menu.
Opening a Ticket
Once you are able to navigate your social media tickets, you will be able to begin resolving these tickets. To begin, click the ticket ID, which is located within the support ticket information row. You will be taken to a new screen with information about this ticket.
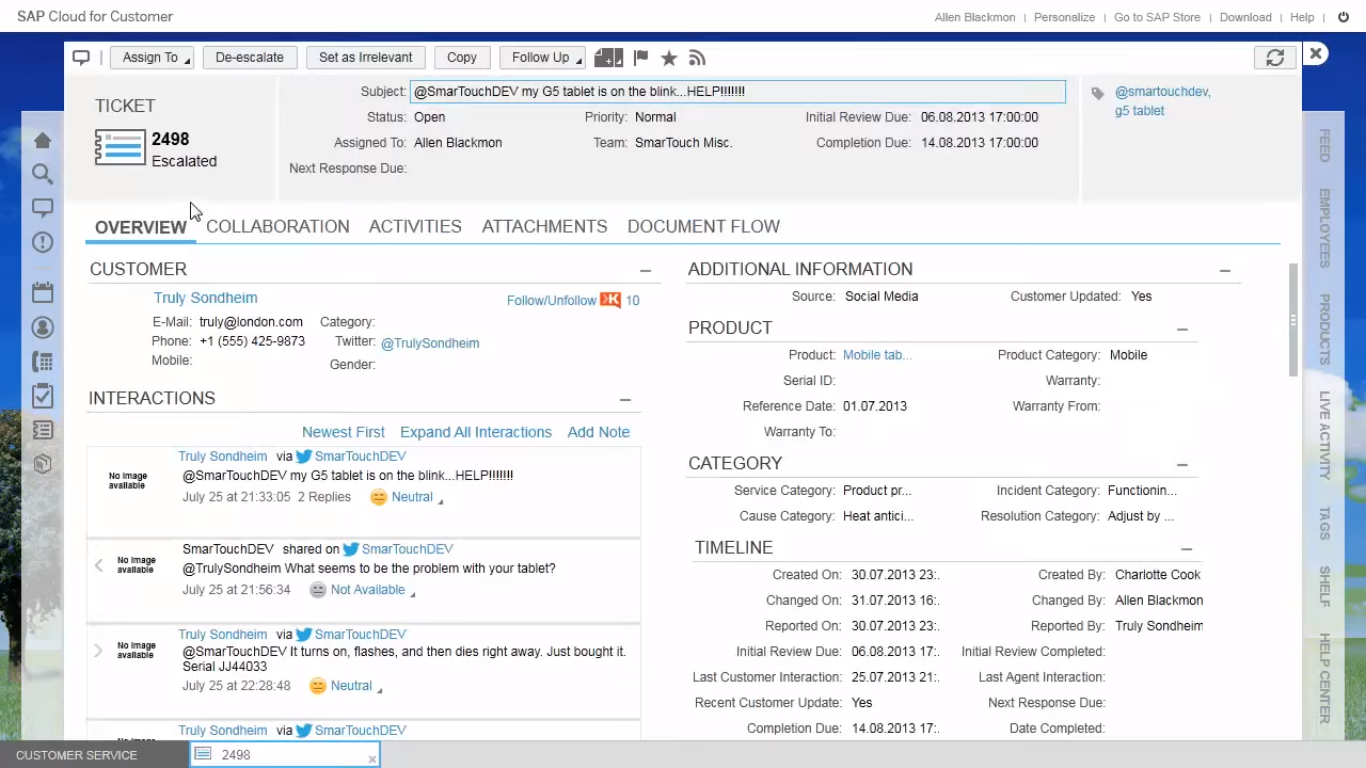
This Ticket window has fields for customer information, including the customer’s name, email address, phone number, and social media profiles. Also accessible is information about the customer’s past interactions with your company.
Besides customer information, the Ticket window includes information about the customer’s product – including serial number – and his or her warranty, if applicable. This information will help your agent decide what measures to take or if a ticket needs to be escalated.
This customer history not only includes prior tickets they’ve open up with your support team but also social media messages made to your channels. This is useful for understanding the customer’s previous issues and building a rapport with the customer.
Also Read: Optimize the Efficiency of Your Business Processes with Cloud Technology
Researching a Solution
Within this window is the Solution Finder, which is a useful tool for support agents to locate possible answers in advance of their communications with the customer based on keywords that match between the customer’s ticket and support articles written for those issues. Support agents should review these relevant articles or pass them along to the customer.
The Ticket window also includes an area for similar tickets, also based on keywords pulled from the ticket. Support agents may wish to review these past tickets during their research in finding an answer for the customer.
Notice the tabs Assign To and Follow Up at the top of the window. These tabs will allow you to take further action to resolve the ticket.
Replying to a Customer
Within the Ticket window, below the list of the customer’s prior interactions, there is a reply box, which allows the support agent to send a reply message to the customer via the most relevant communication channel.
The box layout is similar to other social media and email clients, so a support agent is able to add any information, including URL links and attachments, that the customer may find useful. This reply box, depending on your system setup, may allow the agent to attach an invitation to a chat session for back-and-forth communication in real-time.
Performing Ticket Tasks
Ticket information is quickly and easily editable. To change the status of a ticket, click Edit at the bottom of the screen, and choose the correct status from the dropdown menu that appears. Choose the priority of the ticket by using this same method.
Sometimes, the original agent will not be able to adequately resolve the customer’s issue. In this case, the ticket will have to be escalated or reassigned. To escalate, choose the Escalate button at the bottom of the screen, and click Yes to confirm.
According to your system’s settings, the task may be assigned to a supervisor or subject matter expert. To assign the ticket to another agent or team, choose the Assign To button at the bottom of the screen and select either Agent or Team, and enter the appropriate name.
In addition, tickets may be designated as irrelevant or copied into a new ticket using similar actions as above.
Creating a Response Template
Oftentimes, customers have similar issues that warrant similar options. By using a template, you can quickly respond to a customer, without having to take the time to write out a resolution that you’ve already written before. To access and create new templates, click on the Customer Service tab at the top of the main menu, and then click on Templates.
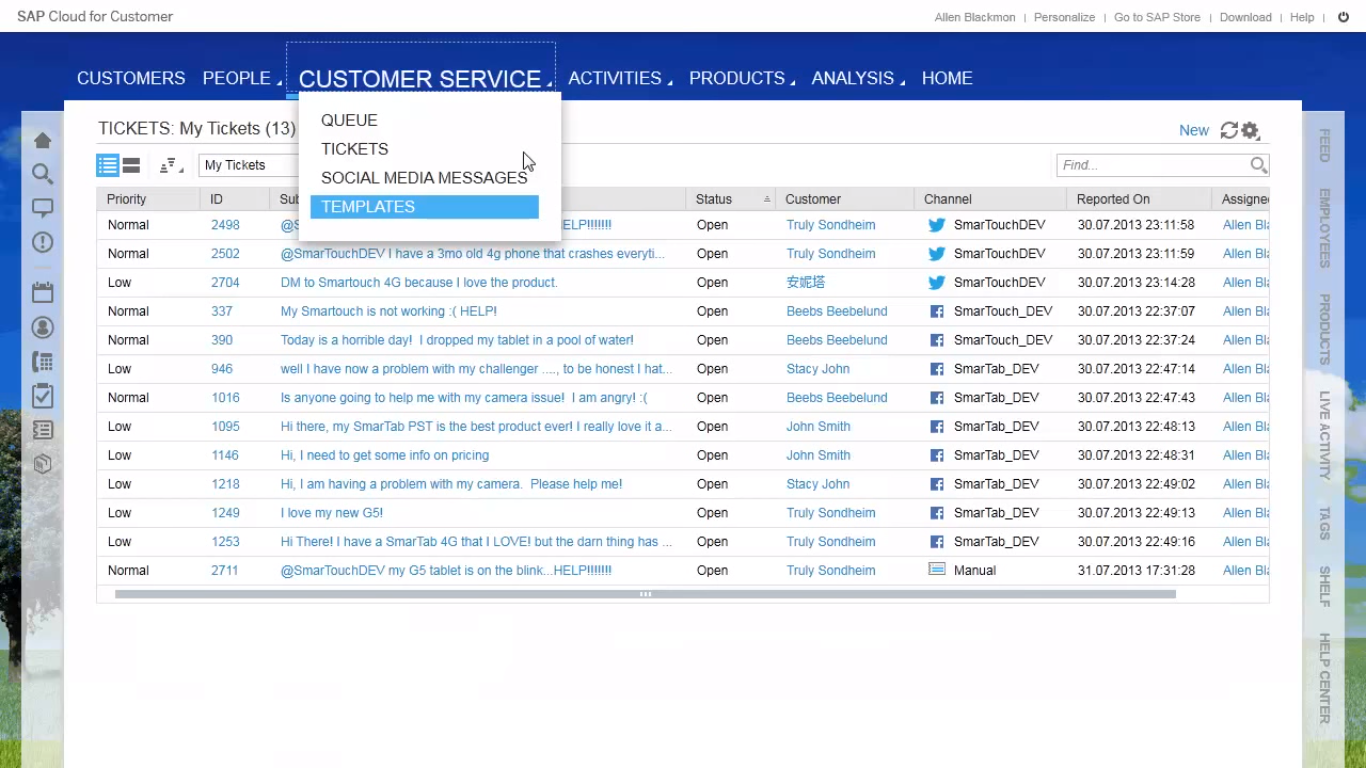
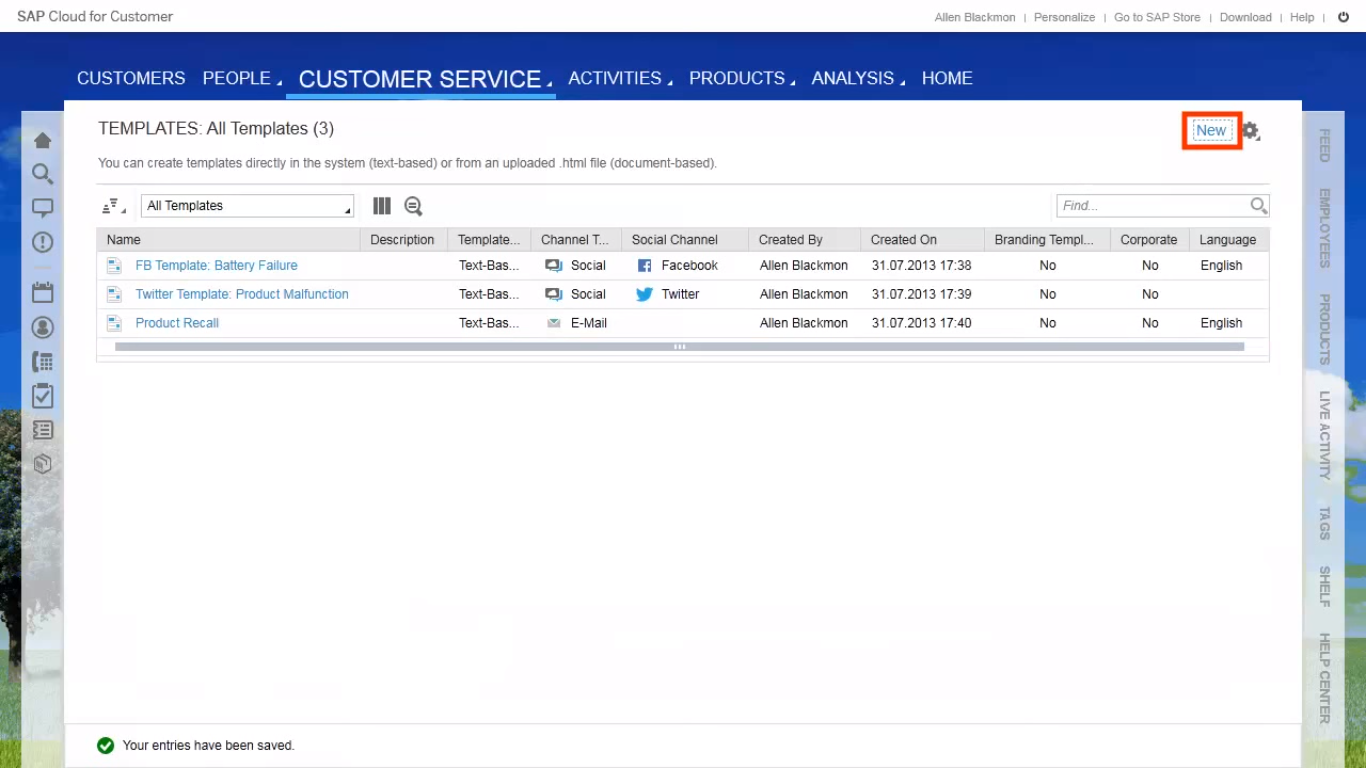
In the Templates view, you’ll be shown any previous templates created, sortable by name, description, channel, creator, and more.
To create a new template, click the New button in the top right corner of the screen.
You may create a template for either email responses or social channel responses. For email responses, enter the email templates name, and information such as the subject line and the text for these email responses. For social media templates, you should enter similar information, then choose which social channel this template applies to.