3D scanning is the future. That’s not even a guess, it’s absolutely true. The technology has revolutionised huge numbers of industries ranging from high end infrastructure projects to commercial industries like film and gaming, even to non-commercial enterprises like town planning, archaeological surveys or creating online tours of museums.
These days even our vacuum cleaners aren’t immune with some robotic cleaners creating a digital model of the house using 3D scanning so they can track their own movements and concentrate on major traffic areas. But there’s a lot more than just scanning, there’s modelling and printing too, so let’s take a look.
Types of 3D scanning
There are three main types of 3D scanning these are:
- Photogrammetric – uses multiple photographs to extrapolate the shape of an object
- Laser pulse – collects geometrical information by evaluating the time a laser beam takes to travel between its emission bounce back
- Structured light – projects patterns of light and measures the return time similar to how radar or a Kinect sensor works.
All three of these options for 3D scanning are commercially available, and have various strengths and weaknesses.
Photogrammetric uses advanced AI technology to overlay images to extrapolate data – and was actually used in world war 2 as a way to analyse aerial photographs – but is greatly limited by the quality and quantity of the photos.
Laser pulse is a fairly cheap and straight-forward option for scanning three dimensional objects and provides reasonable quality, but is limited in total detail – especially for handheld devices that move at inconsistent rates.
Structured light is the most detailed option for scanning 3d objects, sending out a pattern of light in order to receive the most detailed information, but it is also the most expensive and many jobs simply do not require the high detail that structured light scanning provides.
Consider carefully what your job or project needs. High detail masterpieces require high-quality tools, but if you don’t need high detail, perhaps regular laser pulse might suffice.
Alternatively if all you need is to capture an image, then perhaps combining your regular phone or digital camera with photogrammetric analysis will do.
The Basics of 3D Modelling
3D modelling could be a university degree in its own right, but in a nutshell it’s about taking the information gathered from the scan and then running it through 3D modelling software in order to view, edit and perfect to your heart’s content.
Although a lot of 3D modelling is more art than science, one of the most importants questions to answer is what size, type and number of polygons do you want to use?
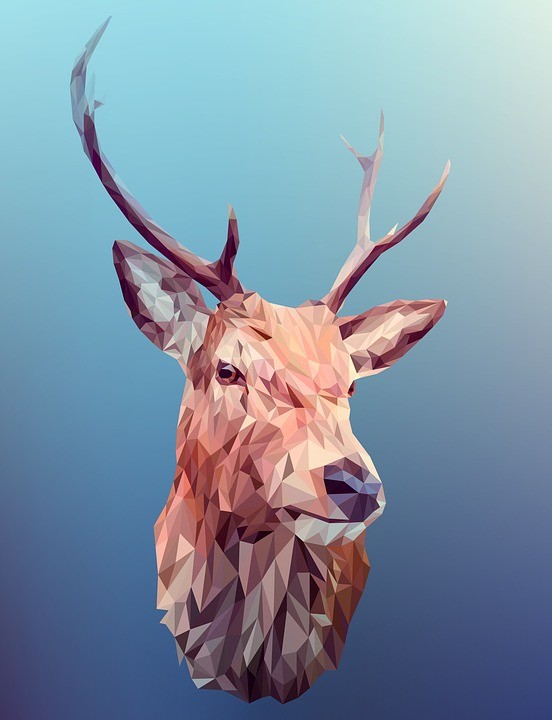
Polygons dictate the total amount of detail that will be rendered through 3d models. The most popular option for polygon shape is triangles, as it offers the most detail, but many programs offer square and pentagon shaped polygons for increased diversity in appearance.
With enough polygons and a diverse enough colour palette, even photo-realistic images can be created with this software.
However, while we might want to have as many details as possible, more polygons means more physical hard drive space, increased difficulty in digital rendering or physical replication, and there is artistic merit in having low-poly visuals.
After all, how better to cement a personal style than to use a polygon count that leaves some of the details up to viewer imagination?

The Basics of 3D Printing
3D printing is where the digital meets the technical, and boy is there a lot of technical information out there about this. This is where the model you’ve scanned and adjusted can be fed to a machine that will take that data and cast it into a physical form.
The first step is employing a slicer to take your image and transform it into something that a machine can use. In short, a slicer is a program that converts digital 3D models into printing instructions for any given 3D printer to build it into a physical object.
Slicer software is therefore appropriately named because it virtually “cuts” 3D models into many horizontal lines. In addition to the model itself, the instructions contain user-entered 3D printing parameters, such as layer height, speed, and support structure settings.
These instructions are then sent to the printer which gets to work. There are three main types of 3D printing available in the commercial sphere.
These are:
- FDM 3D Printing – this is the most common amongst hobbyists, it works by heating and pushing plastic through a nozzle to build a model line by line.
- SLA 3D Printing – is a newer option gaining popularity due to high accuracy works by etching a layer of the model via a uv laser on a vat of uv reactive resin.
- PBF- powder bed fusion – is the most common in industrial applications. It’s a 3D printing method that joins powdered material point by point using an energy source typically a laser beam or an electron beam
Every 3D printed technology creates 3D objects by adding material layer by layer. 2D layers that will later be printed, one at a time.
It takes time depending on the size and complexity of your model, and the capabilities of the printer, but when it’s done you’ll have a completed product made to your exact specifications!
So there we have it! The basics of the 3D scanning, printing and modelling process. Think hard about what you’d like to be able to do before you buy anything, but like we said 3D scanning and modelling is the future – and present – of many industries.
Once you find what you’re looking for there are few better alternatives, and the power to rely on yourself is one that is certainly worth investing in.
