
Sometimes there are problems with your MacBook display that can be fixed only by replacing the screen with a new one. This mostly refers to physical damage that has disabled the display or prevents it from working properly.
In this article, we will tell you how to perform the A2337 MacBook Air screen replacement without outside help using our step-by-step instructions.
You’ll need:
- New screen for MacBook Air 13 A2337;
- Torx screwdrivers T3-T5, T8, and P5;
- Spudger and tweezers.
MacBook Air A2337 Screen Replacement: Instructions
If you want to replace the display, just follow the instructions provided below in our step-by-step guide for MacBook Air 13 2020, model A2337.
1. Removing the Rear Cover
You need to remove the back cover. After that, remove the battery to prevent an unintended activation of the device.
With this in mind, proceed in the following order:
- Remove the 10 screws (memorize their locations).
- Use your fingers to pry up the cover at the bottom of the case and move it toward you.
- Remove the cover by releasing it from the retaining tabs.
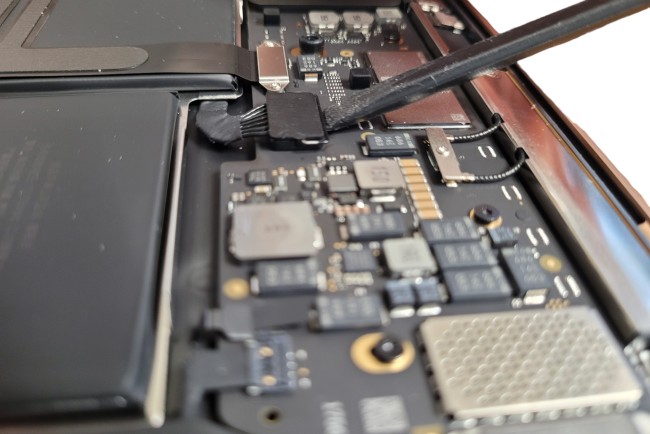
2. Disconnecting the Battery
Here is how you can remove the battery pack:
- Use the flat end of the spudger to lift and release the tab on the battery connector.
- Move the locking lever vertically, remove the connector from the motherboard slot, and remove the battery.
3. Preparatory Phase
Detach the connectors and cables of the various components of the unit to gain access to the display:
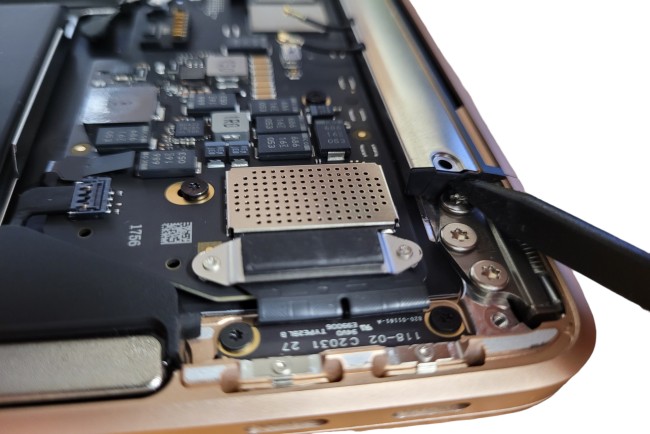
- Remove the antenna cable cover. Remove the screw securing it, grasp the connector alternately from both sides with tweezers, and pull it upwards.
- Remove the two screws on the display cable connector cover, and then disconnect the cable from the antenna board.
- Remove the six screws holding the antenna bar in place.
- Insert the pointed end of the spudger between the left bar and the display hinge, and twist to release the antenna bar. Do the same on the right side.
- Lift and pull the antenna bar to the side. If necessary, use a little force as the strip is secured with adhesive.
- Guide the antenna board through the space in the center portion of the strip and disconnect it from the housing.
- Remove the screws from the hinges (two in each corner), but leave the center ones in place for now.
4. Display Replacement
Finally, you need to install the new screen in place of the old one:
- Open your MacBook Air, and place it on its edge with the screen facing away from you.
- Remove the four screws that are in the center.
- Smoothly open the unit to a right angle.
- Move the display so that it detaches from the case hinges at the bottom and remove it.
Once the display has been replaced, proceed with the reassembly in reverse order. You should strictly follow the sequence of actions described in the instructions. Handle small parts and connectors very carefully so as not to damage the contacts or break anything.
If your MacBook won’t boot when you turn it on, simply plug it into a power source.
Source: AppleParts Blog